Author Archives: mrjones

NAT and Macvlan on production LXD (plus reverse proxy & SSH Config)

7 minutes, 41 seconds

Intro and LXD install

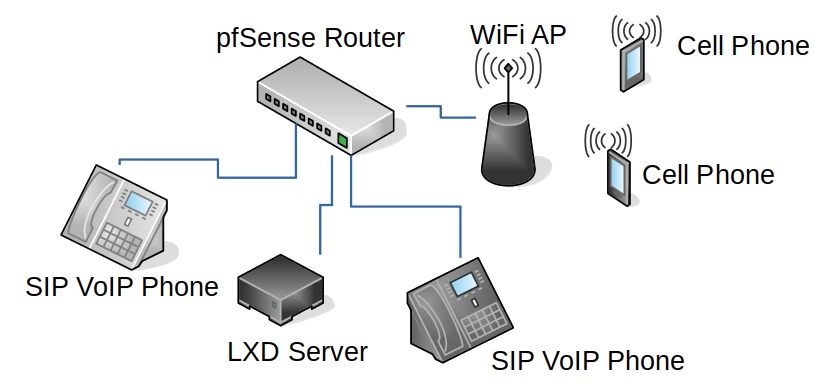
At work recently I was charged with rebuilding a bare metal host. Beyond needing to follow our security best practices and be well documented, it was left up to me how to do it. I had my own needs for test VMs and there was a pending request for a VM* for semi-production instance. This meant some VMs* would be fine in a traditional NATed environment, where they had no publicly accessible interfaces, and others would need full fledged public IPs. (* – I’m using “VM” liberally in this post. These are technically LXD containers which use the host kernel.)

Given my penchant for LXD, I’m guessing you can see where this is going ;) If you don’t know my penchant, check out these posts, specifically, “From zero to LXD: Installing a private compute cloud on a Cisco C220 M4SFF“.

I won’t go as into nitty-gritty detail on the hardware setup (this time with an older c220 M3 LFF instead of the new M4 SFF), but I set up the system very similarly, but was forced to use a RAID10 set up on 4 drives – no fancy ZFS set up this time. I’ll see some performance and features lost as LXD was configured to just use filesystem (/var/lib/lxd), but given I have bare metal in a colo with as many VMs as I want, I’m happy ;)

After installing Ubuntu 18.04, giving it a static IP and running our Ansible hardening roles against it, I was ready to configure LXD. The nice thing about LXD is that you can have as many container profiles as you want. This means I can zip through the default lxd init process to have VMs which are behind NAT and then trivially add a new profile that allows hosts to have a public IP after that.

The initial config of LXD looks like this:

Would you like to use LXD clustering? (yes/no) [default=no]:
Do you want to configure a new storage pool? (yes/no) [default=yes]:
Name of the new storage pool [default=default]:
Name of the storage backend to use (btrfs, dir, lvm) [default=btrfs]:
Create a new BTRFS pool? (yes/no) [default=yes]:
Would you like to use an existing block device? (yes/no) [default=no]:
Size in GB of the new loop device (1GB minimum) [default=15GB]:
Would you like to connect to a MAAS server? (yes/no) [default=no]:
Would you like to create a new local network bridge? (yes/no) [default=yes]:
What should the new bridge be called? [default=lxdbr0]:
What IPv4 address should be used? (CIDR subnet notation, “auto” or “none”) [default=auto]:
What IPv6 address should be used? (CIDR subnet notation, “auto” or “none”) [default=auto]:
Would you like LXD to be available over the network? (yes/no) [default=no]:
Would you like stale cached images to be updated automatically? (yes/no) [default=yes]
Would you like a YAML "lxd init" preseed to be printed? (yes/no) [default=no]:

After that, and HUGE thanks to this concise post by Simos Xenitellis, we can now configure a new profile with Macvlan for VMs that need a public IP. Simos’ post really covers this nicely (I even use their same code snippets ;), but by copying the default profile (lxc profile copy default lanprofile) and then setting the the nictype (lxc profile device set lanprofile eth0 nictype macvlan) and the parent (lxc profile device set lanprofile eth0 parent enp5s12) on the new profile, we’re ready to go. Note that this assume your bare metal’s nic is enp5s12 and your LXD VMs use eth0 (the default).

Network types: NAT, Bridge & Macvlan

But wait, what is Macvlan? And, just so we’re all clear, how does it differ from the default NAT set up or the fancy bridged set up in my earlier post? Let’s break it down:

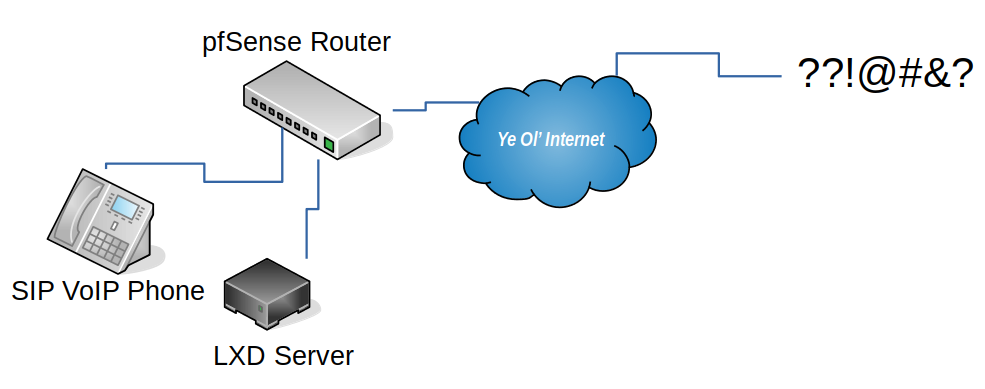
  • Network Address Translation (NAT) – You’re very likely using this right now to read this post ;) NAT is what enables us to easily share a connection to the Internet with out everyone having a public IP. Have you seen IPs that start with 10.x.x.x, 172.x.x.x or 192.x.x.x? While not exclusive to NAT, they’re the most common IP ranges used in conjunction with it (See RFC 1918 for TMI). NAT allows a gateway to hand out these IPs which then can send traffic out to the Internet and, by modifying the ports used, send the responses back to the NATed host who originally made the requested.

    NAT is what LXD uses when you accept all the defaults in lxd init. This is super handy for testing and development! As well, we can use it to our advantage with a reverse HTTP proxy in production – more on this below.

  • BridgeBridges are a layer 2 connection that makes it appear as all devices are on the same network. This is convenient when you want all devices to work with the same IP range, either with public IPs or in your NATed network. This is how I set up LXD in the prior article. Any time a VM is created in LXD, it can see all hosts, but it does take a slightly more complex network set up on the bare metal.

  • Macvlan – I’ll quote this great write up on hicu.be to describe Macvlan, “[it] allows you to configure multiple Layer 2 (i.e. Ethernet MAC) addresses on a single physical interface. Macvlan allows you to configure sub-interfaces (also termed slave devices) of a parent, physical Ethernet interface (also termed upper device), each with its own unique (randomly generated) MAC address, and consequently its own IP address.”. This achieves the same result as bridges with one major caveat: host and VMs can not talk to each other. That is, your VMs won’t be able to talk to you bare metal LXD host and vice versa – caveat emptor!

Now that you know what the three setups are, and how easy it was to set up NAT (just accept LXD defaults) and how easy it is to set up Macvlan (3 command line calls) – let’s see what we can do with them!

Again per Simos’ post, we can easily create a new NATed VM and then a Macvlan VM like so:

lxc launch ubuntu: natVM
lxc launch -p lanprofile ubuntu: lanVM

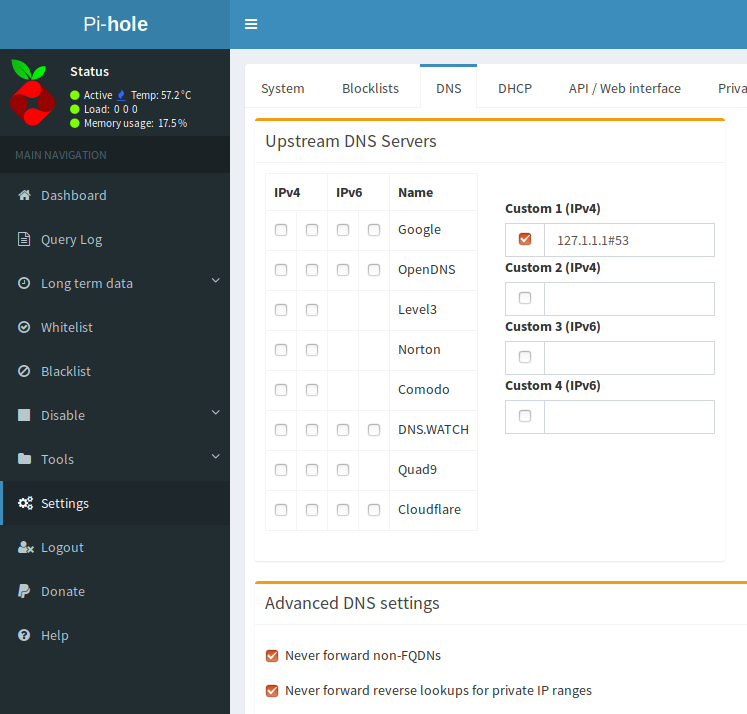
To set a static IP on either host, assuming your running Ubuntu 18.04 like me, you’d just edit /etc/netplan/50-cloud-init.yaml. So let’s say I wanted to give the natVM IP .10 in the 10.x.x.x range that LXD gave me and use Quad9 for DNS. I’d edit50-cloud-init.yaml to look like this:

network:
   version: 2
   renderer: networkd
   ethernets:
     eth0:
      dhcp4: no
      addresses: [10.0.0.10/24]
      gateway4: 10.0.0.1
      nameservers:
        addresses: [9.9.9.9]

This ends the part of the post where we talk about NAT and Macvlan both easily co-existing on LXD. Now on to what you might do with that set up! Specifically, how you might use Apache to forward on HTTP requests on a public IP to a NATed VM.

Apache reverse proxy

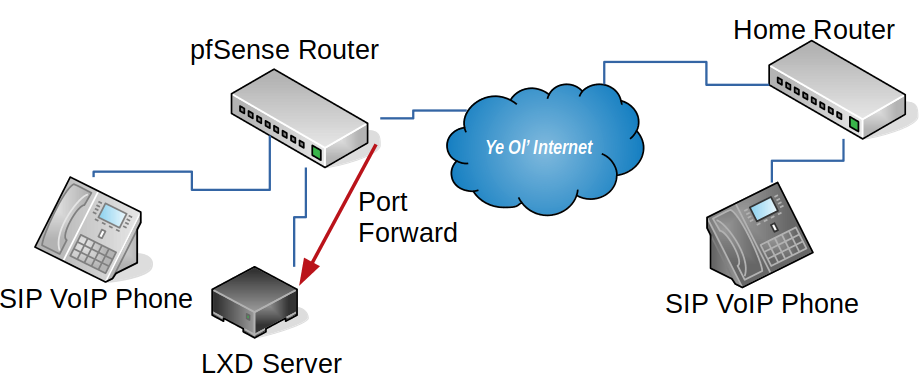
If you wanted to run lots of VMs, none of which needed a public IP, but a few needed to run a public service, you might wonder how to best do this? In my case, I had a small amount of public IPs, so burning one for every VM was a big waste. A better way is to just selectively forward some HTTP traffic from the bare-metal host’s public IP to a NATed VM’s IP. I’m an Apache kinda person, but this could be done with your web server of choice. It goes with out saying, but this trick will only work with HTTP traffic. I’ll speak to being able to SSH “directly” to any NATed hosts below!

Let’s get started by installing apache2 on the Ubuntu bare-metal host and enable some key modules:

apt install apache2
a2enmod ssl rewrite proxy proxy_http

Now edit /etc/apache2/ports.conf  so that it’s listening on any ports you need – in our example it’s 3000 (Grafana) and 8086 (InfluxDB) so we’ll add just two lines:

<IfModule ssl_module>
   Listen 443
   Listen 3000
   Listen 8086
</IfModule>

Assuming you want to run a service on 8086 (InfluxDB) and a service on 3000 (Grafana) on the VM we configured above on .10, you’d create a vhost file called /etc/apache2/sites-available/influxdb-int.conf and it would look like this:

<VirtualHost *:3000>
         ServerName grafana-int.example.com
         LogLevel warn
         SSLEngine on
         SSLCertificateFile /etc/httpd/ssl.crt/your.crt
         SSLCertificateKeyFile /etc/httpd/ssl.key/your.key
         ProxyRequests Off
         <Proxy *>
             Require all granted
         </Proxy>
         ProxyPass / https://10.0.0.10:3000/
         ProxyPassReverse / https://10.0.0.10:3000/
 </VirtualHost>
 <VirtualHost *:8086>
         ServerName influxdb-int.example.com
         LogLevel warn
         SSLEngine on
         SSLCertificateFile /etc/httpd/ssl.crt/your.crt
         SSLCertificateKeyFile /etc/httpd/ssl.key/your.key
         ProxyRequests Off
         <Proxy *>
             Require all granted
         </Proxy>
         ProxyPass / http://10.0.0.10:8086/
         ProxyPassReverse / http://10.0.0.10:8086/
 /VirtualHost>

Note that this assumes you’re running everything over TLS (you should!!). As well, it assumes that your cert (SSLCertificateFile) and key (SSLCertificateKeyFile) are in /etc/httpd/ssl.key . Change these according to your specifc set up.

From here, you would follow the set up your apps to ensure they’re working locally on .10 and they should work on the public ip of your bare metal. Of course these all need to be configured to use TLS over the default HTTP. Huh – sounds like a whole “How to harden your TIG deployment” might be in order! (Of course, store any passwords encrypted when automating your deployments.)

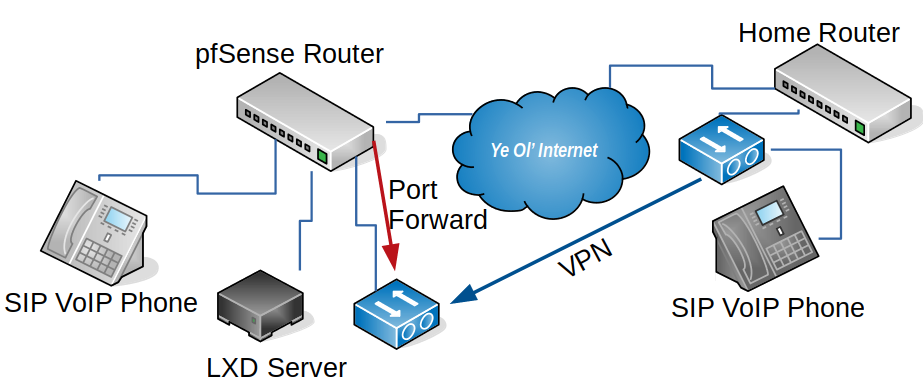
Secure SSH to NATed LXD hosts

A final note on this set up is how to securely SSH to LXD hosts. Of course you can just SSH to your bare metal host and then bash in (eg lxd exec natVM bash), but how do you run your Ansible roles against these NATed VMs or another automation tool? SSH config files to the rescue!

Let’s assume your public IP of your bare metal is 1.2.3.4 and you want to ssh to the 10.0.0.10 IP we just set up above. All you need to do is create a file in your .ssh folder called “config” with 3 lines like this:

Host natVM
   Hostname 10.0.0.10
   ProxyCommand ssh -W %h:%p 1.2.3.4

With this set up, you can run ssh natVM and your config will automatically see the configuration to securely proxy the command through the 1.2.3.4 host through to your internal only .10 host. This works especially well when you have SSH Keys set up with SSH Agents.

Drop me a note if you have any questions!

Installing VirtualBox on MacOS via VNC – just use a real mouse

1 minute, 53 seconds

At work the other day I was testing our Ansible instructions on how to get a development environment set up. Given that this was supposed to be platform agnostic and that I exclusively develop on Ubuntu and LXD, I found an old Mac Mini on Craigslist to run VirtualBox on. As it came with only 2GB of RAM, I was happy to discover you can actually upgrade to 16GB per the Everymac site:

Officially, this model supports 8 GB of RAM, but … it actually is capable of supporting 16 GB of RAM using two 8 GB modules.

– EM

Add an old 500GB SSD I had kicking around, and now the machine is pretty responsive for being 7 years old and costing me $190 all in!

Given I didn’t want to dedicate a keyboard, monitor and mouse to this, the very first thing I did was to enable Remote Desktop, specifically VNC, and stuffed it with my other mini servers in the “server room”:

I then went about zipping through installing Ansible, VirtualBox and Vagrant .

When I went to boot my first VM, I got weird error on the command line (I didn’t save it, sorry). After some trouble shooting, I decided to just re-install, and more slowly this time, and the GUI showed me this:

Baffled, I tried again and again, failing the same way every time. Researching the problem, I found a post on Medium suggesting I hadn’t allowed the correct permissions in the Security & Privacy settings. None of these suggestions helped. Finally, I read the comments at the bottom of the page, including the one from Elias Politakis which said,

Please note that if you are using a VNC connection (or similar remote access software) you won’t be able to click the [Allow] button because OSX requires that Process ID pressing the Allow button is zero (0) which is the system PID. You would need to physically visit the Mac and click the Allow button with the physical mouse.

– EP

Oh, OK! But…now I had to extract the Mini from the server room :( Then I remembered I had a spare wireless mouse! What I did was plug the mouse in to the mini, then back to my desktop worsktation where I connected to the Mini over VNC and the mouse was able to still work all the way back to the closet. Then I could click the button with a real mouse, but without using a real monitor or real keyboard, or even moving the mini:

So – if you happen to be like Elias or me, just use a real mouse! Happy computing.

Easy Pi-Hole and Stubby on Orange Pi Zero & Raspberry Pi 3

4 minutes, 8 seconds

Skip to the install guide if you just want to know how to set up your Pi easily ;) Otherwise, read on for a little background.

Introduction


I’ve been deep in DNS land of late. At work I’m working on DNS Stats and helping QA/release/document a packet capture tool for DNS stats. I even, just today, automated a complete Pi-Hole install to have a reliable dev environment for DNS stats. At the shop, I’ve set up the same encrypted DNS + Pi-Hole + LXD + Quad9 as I have at home. It’s all DNS all the time here is what I’m trying to say ;)

I’ve yet to find the magic sauce to compile Stubby on the Orange Pi Zero board though. It’s so cheap ($20 shipped), has a built in Ethernet, and is just so dang cute! So, I was looking around at stubby posts and Linux posts and Ubuntu posts and found this great write up on Ubuntu 18.04 and stubby and it said,

Stubby is in Ubuntu 18.04 repository

-linuxbabe.com

This was awesome! This means my previous trickery of having to compile stubby from source on Ubuntu wasn’t needed! However, the revelations about easy DNS set up and encryption were only just getting started.

The next one I found was that the 4.0 release of Pi-Hole from early August, had a new feature: custom ports can be used for upstream servers. Wham! This double awesome! Now, in the GUI of Pi-Hole, you could safely add a the IP of stubby and specify a random port to use! But we’re done yet, no sir, two more revelations to go.  Hold on.

The penultimate revelation was BOTH the Orange Pi Zero AND the Raspberry Pi 3 b had a release of Ubuntu 18.04 for them. This means that you not only don’t have to compile stubby for your x86 LXD environment, but you don’t have to do it for ARM SoC setups either! Yay!

The final revelation dates back to a long, LONG time ago, and I’m just late to the party.  I’m talking proto-internet long time ago.  The legend Jon Postel decided that not only would IPv4 have a reserved IP address of 127.0.0.1 for localhost, but in RFC 790 in 1981, he said it would actually be a /8, so you get just over 16 million localhost IPs just for your bad ass self. This means you don’t actually need the new port specifying feature of Pi-Hole – you can just set up Stubby on port 53 on 127.1.1.1 and Pi-Hole on port 53 on 127.0.0.1. Ugh – this makes it so much easier – if I only was more a network guy!

Now that my rambling background on my recent revelations is done, let’s get to the technical write up.  Though, honestly, this part will be pretty short and sweet.

Installation Guide

This guide assumes you’ve downloaded and installed Ubuntu 18.04 for either your Orange Pi Zero or Raspberry Pi 3 B. Note that both the official download page of both Orange Pi and Raspberry Pi Foundation, do not list 18.04 options. It also assumes you’re running everything as root. The instructions are identical for both boards:

  1. Ensure you’re up to date:
    apt-get update&&apt-get upgrade
  2. Install Stubby: apt-get install stubby
  3. Edit /etc/stubby/stubby.yml so that it’s listening on 127.1.1.1:
    listen_addresses:
     - 127.1.1.1
  4. Restart Stubby: systemctl restart stubby
  5. Install Pi-Hole. Use what ever upstream DNS server you want when prompted, we’re going to override it with Stubby:
    curl -sSL https://install.pi-hole.net | bash

    IMPORTANT
    – See Troubleshooting below if you get stuck on “Time until retry:” or “DNS resolution is not available” when installing Pi-Hole

Pi-Hole DNS settings
  1. Log into your new Pi-Hole at YOUR_PI_IP/admin and go to Settings -> DNS. Uncheck any DNS servers and enter a Custom 1 (IPv4) of 127.1.1.1:

Coming full circle, the Reddit thread I cited in my original write up, now has a comment that Ubuntu 18.04 has a Stubby package.

Quad9

If you want to use Quad9 (and I think you should ;), in step 3, while you’re in stubby.yml, comment out all the other servers in upstream_recursive_servers: and un-comment Quad9 so it looks like this::

upstream_recursive_servers:
  - address_data: 9.9.9.9
    tls_auth_name: "dns.quad9.net"
  - address_data: 2620:fe::fe
  tls_auth_name: "dns.quad9.net

Full disclosure, I work for PCH which sponsors Quad9.

Troubleshooting

A few things I found while researching this post that might help you:

  • The login on the Raspberry Pi is Ubuntu with password is Ubuntu. The login on the Orange Pi Zero is root and password is 1234. Check out my SSH Bootstrap trick as well.
  • The Orange Pi Zero didn’t get an IP via DHCP the first boot. A reboot solved that.
  • The Pi-Hole script gave me a headache when installing. Near the end of the install it said, “Starting DNS service” and then was waiting to retry. I found a post on the Pi-Hole boards that solved it perfectly. To work around this, edit /etc/init.d/pihole-FTL so that this line:

    su -s /bin/sh -c "/usr/bin/pihole-FTL" "$FTLUSER"

    is replaced by this line:

    /usr/bin/pihole-FTL


    After that, be sure to reload your init script with:

    systemctl daemon-reload

    Finally you should be able to complete your install just by restarting Pi-Hole:

    systemctl restart pihole-FTL
     

  • Even though I followed step 4, during one my tests stubby was still blocking port 53 on 127.0.0.1. If that happens, restart stubby:

    systemctl restart stubby
     

  • At any point you can test that stubby or pi-hole is working. These are good to intersperse with each install and configuration change:

    dig @127.1.1.1 plip.com +short # stubby
    dig @127.0.0.1 plip.com +short # pi-hole

Bootstrap SSH on Ubuntu Core with out Ubuntu SSO credentials

1 minute, 23 seconds

I was playing around with Snaps and I wanted to try out Ubuntu Core as well. I still had some of those  Orange Pi Zero boards laying around and when you go to the Core Download page – there’s an option for Orange Pi right there – sweet! I downloaded the .img file, wrote it to my microsd card with dd, slapped it in my Orange Pi Zero, found the new IP in my DHCP server and off I went to SSH in.

Then I saw this step on install docs:

you will be asked to enter your Ubuntu SSO credentials

– Core Install Docs

Whhhaaat? Oh, I see, Core’s whole shtick is that it’s secure by default. They say, “Secure by default – Automatic updates ensure that critical security issues are addressed in the field, even if a device is unattended.”.  Cool, I can get behind that. IoT needs some thought leaders in IoT security. However…I still just want to SSH in and poke around a bit – I don’t want to have to set up an account at Ubuntu. 

Then I thought, “What if I just create a .ssh directory in /root/ and put my public key in the authorized keys file?” Assuming you’re on an Ubuntu system, logged in as mrjones and just stuck in your microSD card with the core image on it, that’d look like this:

cd /media/mrjones/writable/system-data/root/
mkdir .ssh
chmod 700 .ssh/
vim .ssh/authorized_keys 
chmod 700 .ssh/authorized_keys

After unmounting the card, inserting it into and rebooting my Pi, I SSHed as root and it just worked – that’s awesome! Now you know how to do it as well!  In fact, this likely will work with the Raspbian, Armbian and Ubuntu images for all kinds of Pi boards as well.

Stay tuned for my next post where I’ll massively simplify my stubby and pi-hole how to!

Teaching Kids About Busy Signals with a PBX on LXD for $15

2 minutes, 40 seconds

Linksys RTP300 Circa 2005

The other day the kids and I were at our local, awesome Goodwill store. I guess they’re all awesome, eh? I was looking over the pile of small electronics while the kids picked out a shirt (“any shirt you want!!”), and stumbled across a device with Ethernet jacks (RJ45) and phone jacks (RJ11). It’s a router with two ATA ports – cool! It was only $5 bucks!! A quick internet search suggests that it may be locked to a provider like Vonage, but that there’s lots of folks unlocking it. Given this was Goodwill, there were was a plethora of POTs devices handy – two more phones at just $5/ea – no problem!

Now that I had the whole kit home, it was time to see what the ATA was up to. It’s a Linksys RTP300 – and the voice section was definitely locked down :( But that means it’s time to start hacking! I dug up the site I initially found before buying it – luckily all the downloads still work! The post is 8 years old, forever in ‘net time, so I was impressed.

I’m pretty pleased with myself because I fully understood everything and was able to improve the process because of this. Mainly:

Using inspector tool to make the ping input field longer
  • Being a web developer I already had a web server running. This is much easier to use instead of setting up a new TFTP server as they suggested.
  • Being a web developer (still) I was kinda in awe that I’d already forgotten how amazeballs Firebug was, and how I take for granted that modern browsers have such good developer tools built in.
  • Knowing all the linux commands used (wget, chmod, cd & dd) I was able to explore the device a bit
  • I figured out that the guide wanted you to download into /var/tmp which didn’t exist on my device, but /var worked
  • They have you download some *.img, but running it through strings and checking the size, it appeared to match the 3.1.24 version. Completing the install confirmed this. However, md5sum outputs don’t match.
That, sir, is an odd response to a ping ;)

After all this I had a generic, if not quite dated, ATA that was ready to talk to a VoIP provider. Time to install Asterisk! This is where LXD comes in. I already had my home server running Stubby and Pi Hole – time to add another. After spinning up an Ubuntu 16.04 box, hitting a snag, then spinning up an 18.04 box, a quick apt-get install asterisk and I was ready to go!

I created 4 extensions, one for each of us, by following some simple guides I’d found (edit /etc/asterisk/sip.conf, /etc/asterisk/extensions.conf and a reload). I plunked in the LXD Asterisk IP, extension and password and BAM! both lines registered easy peasy on the ATA.

With two hard phones set up (just plug ’em in to the ATA), I set up me and the wife using the built in client on our phones. Now we all had a phone and could call each other. See the gallery below for the visual story!

On a personal note, this was pleasing for a two reasons:

  1. I saved 3 small electronic devices from the landfill.  More and more I’m trying to be conscientious about buying less or buying used.
  2. My kids got to look up at me and say, “it’s making a weird sound!?” I explained to them that it was a “busy signal”.  See, cell phones, office phones and 99% of home phones don’t do this any more. They have either call waiting or voice mail, or both ; )

Deploying a PGP SKS server on Ubuntu 18.04

3 minutes, 37 seconds

Intro

While the venerable Matt Rude has a great write up on compiling the latest SKS server for Ubuntu 18.04, using the one that ships with Ubuntu 18.04 is considerably easier. Given I just did this for work, this blog post has already been 99% written – handy!

The prerequisite for this guide is that you have root on an Ubuntu 18.04 server with a static, public IP address.

Hardening

This is out of scope for this guide, but you should secure your server. I recommend only allowing SSH with public keys, no passwords. If possible, only allow SSH from your subnet, or from behind a VPN/firewall. Only open the ports to the internet for the keyserver (11371) and SSH (22) if you must. Keep your software up to date – consider turning on automatic updates for security releases.

Initial install

Given that there’s a native Ubuntu SKS package, this one command gets you a LOT. All your config files are put in place, your user is created, a cronjob is added and there’s no compiling from source. While compiling is nice for knowing exactly what code you’re runnig, it’s slower and more laborious to get set up.

Run this as root:

apt-get update
apt-get -y install sks gnupg wget apache2 xz-utils

Configure Apache

Apache functions as a reverse HTTP proxy for the SKS HTTP interface, and so binds to the SKS HTTP port (11371) only on the public IP addresses.

Create the file /etc/apache2/sites-available/100-keyserver.conf with the following contents. Be sure to update the SERVER_IP_HERE to be the real IP:

#######################################
# Configuration for SKS reverse proxy #
#######################################

Listen SERVER_IP_HERE:11371
<VirtualHost *:11371>
    <Proxy *>
            Order deny,allow
            Allow from all
    </Proxy>
    ProxyPass / http://127.0.0.1:11371/
    ProxyPassReverse / http://127.0.0.1:11371/
    ProxyVia On
    SetEnv proxy-nokeepalive 1
</VirtualHost>

Run the following commands as root to set up apache with the new vhost and enable the right config. The last command should yield no errors:

a2enmod proxy
a2enmod proxy_http
a2enmod proxy_balancer
a2enmod lbmethod_byrequests
a2ensite 100-keyserver.pch.net.conf
systemctl restart apache2
systemctl status apache2

Configure SKS

As everything was prepped for you with the apt-get install sks call from above, you only have to define server_contact: and hostname:in the /etc/sks/sksconf file. The contact should be your PGP key ID. Mine is 0xA105C2764BF2C4CB, for example. The hostname is the FQDN for your server.

Initialize the SKS Database

Run the following commands to download a recent dump of the SKS database, decompress it, update permissions and import it. This puts less of a load on other SKS servers as we won’t need to synchronize much when we come online.

When running sks-build.sh, select the ”normalbuild” option. This loads all keys into the database, unlike the ”fastbuild” option, which uses the key dump files as a basis over which to operate, but loads the keys much faster. The bunzip2 and load process will take **several hours to complete**.

Run this as root:


mkdir -p /var/lib/sks/dump/
cd /var/lib/sks/dump/
wget -e robots=off -r --no-parent https://mirror.cyberbits.eu/sks/dump
mv mirror.cyberbits.eu/sks/dump/*pgp .
cd /usr/lib/sks/
./sks_build.sh
chown -R debian-sks:debian-sks /var/lib/sks
systemctl enable sks

Note: The source of the key dump for our installation is http://keys.niif.hu/keydump/. However, a key dump may be obtained from any up-to-date SKS key server, since each is a mirror of all the others. Key dumps from public key servers are listed on sks-keyserver’s wiki on GitHub. If required, any of the sources listed on this page may be used to obtain the key dump.

If you need to rebuild the database from a fresh download for some reason, be sure to fully delete the DB file with rm -rf /var/lib/sks/DB first.

Membership File

For your keyserver to be known by others and have it’s keys be up to date via synchronizatoin, you need to contact the keyserver operators so they they list you in their membership file. That way when you list them, the servers will not not error out.

The format of /var/lib/sks/membership is simply KEYSERVER_URL PORT

After you create it, ensure it can be read by SKS:

chown -R debian-sks:debian-sks /etc/sks/memberships

Start and Test

Start your server with systemctl start sks. That’s it! You’re done.

Monitor the log files for any problems during startup and testing: tail -f /var/log/syslog. As well, check the output of systemctl status sks.

To test, open a browser window to http://YOUR_SERVER:11371. Search for a few different keys to verify that key information is being retrieved correctly.

Check the SKS stats page to verify the number of keys loaded: http://YOUR_SERVER:11371/pks/lookup?op=stats

If you have peered with other servers, verify that it is showing up properly in the pool.

Support the EFF and others in the face of the Tax Cuts and Jobs Act

0 minutes, 28 seconds

I’ll keep this short and sweet: When I read the headline, “EFF sues to kill FOSTA, calling it ‘unconstitutional Internet censorship law'”, I realized how proud I am to support the Electronic Frontier Foundation (EFF) in the form of annual donations. They are an awesome group doing amazing things. Further, my financial support will not wane now that the Tax Cuts and Jobs Act has been passed.

With the direction the current administration is going with human rights and health care, and with the Supreme Court switching up a justice, now, more than ever, is the time to support the causes you believe in. Do you what you can!

SYN Shop Class: SSH Keys with free VMs for members

0 minutes, 37 seconds

As part of putting some good hardware to use, I taught a class on how to use SSH Keys the other week. As this was the first time I taught this class, it took a good long while to do the prep for it. I figured it’d take 6 hours (3 sessions @ 2hr), but I think I ended up putting in closer to 15 hours. There’s still room for improvement!

The slides are available (PDF), as is the video (below). I hope to redo this class so that it’s a generic “learn about SSH Keys” which then could be open to the general public. That said, I’m really glad to see we’re up to 16 containers and the load average is only at 0.37 right now ;)

https://vimeo.com/270495638

PS – I know, I know, those are not VMs, they’re actually containers!

USB-C accessories I like (and some I don’t)

2 minutes, 52 seconds

After buying USB-C power adapter that didn’t work out, I’d been on the hunt for a replacement. After getting a Chromebook for video chats and music (and curiosity :) which has USB-C charging, I had an extra need for cheap, portable chargers and other simple USB-C accessories.

All these devices were tested on either my ASUS Chromebook Flip C101PA-DB02 or my Dell XPS 13 9350 or both.

What I really wanted was to plug a single cord into my laptop and have it work with my external webcam, external speakers, external 4k monitor @60Hz, external wireless headset and USB3 gigabit NIC. In the end, for stability, I ended up going with two cables: one for power and DisplayPort and one USB3.0 for my USB3.0 hub with everything else. My laptop not crashing makes me be totally OK with the two cables ;)


First up is a good, small travel charger with USB-C and USBA ports. It delivers the full 45W so it’ll work nicely with your MacBook and Dell XPS 13. It’ll work with your MacBook Pro, but not at the full rate as the stock charger. It’s the Yojock YKJ USB-C PD Charger with 45W:

After that, if you want a charger that’ll work at home (read: no folding plug), then this charger with attached cable is quite small and cheap. It’s the Nekteck 45W USB-C charger. It only has USB-C and, beware, my XPS 13 9350 says it’s only delivering 40W, but I’ve had no problems with it keeping my laptop charged even when it’s powering an external 4k monitor, running 4 containers, a full IDE and twenty odd tabs in FireFox.

Then, in the non-power-adapter accessories:

These items I don’t recommend as they didn’t work as advertised with my ubuntu laptop;

To be clear, I am gathering the referral kickbacks from Amazon on these links, but I do use these products and wasn’t paid for the positive review.

If you have questions, feel free to contact me or ask in the comments!

Hardware disabling the mic on WyzeCam v2

1 minute, 15 seconds

I’m testing out using two of these cute, cheap security cameras:

It’s the v2 of the WyzeCam and it’s only $25 shipped.

While they’re easy to set up, there doesn’t seem to be a way to turn off the mics on them. Here’s the config screen for a camera on the android app as of version 1.2.76 on Apr 26, 2018:

So what’s a hacker to do? Open it up and remove the mic, of course ;)

2019/01/10 Update – At this point in the post, I should let you know that we’re about to permanently remove your camera microphone. As well, there’s a chance you can rip off the antenna cable, effectively bricking your camera.  Only one reader has reported any problems, but as with all DIY modifications, proceed at your own risk and happy hacking!

2018/05/08 Update! – If you just yank off the mic there’s a LOT less disassembly. I had two more cams come through, so I made a video of the whole thing. 10 minutes or less! Otherwise, read on below for old, solder method.

https://vimeo.com/268523643

Old Solder method – I was too impatient to take all the step by step photos, but the only tricky part was getting the two plastic plates off after the initial two outer screws. My advise: it takes more force than you think!

You have to fully disassemble the camera to be able to solder out the mic. There were 5 or 6 screws, two ribbon cables and an antenna, speaker and camera power lead that all needed to be taken apart.

Here’s a before and after picture:

After re-assembling both cameras everything still works – w00t! Here’s to hardwired audio privacy, as it should be.