2 minutes, 24 seconds
I’ve had a 3d printer for a about 8 months now. It’s been fun to download STLs from the internet and print them. We’ve done articulated snakes and planetary gear prints. It is really amazing to print something in one go that you can move and spin around. Amazeballs!
The kids have printed up little castles and and little knickknacks the designed in TinkerCAD. This has been fun, but I was always bothered that I didn’t know a “real” design program that was also open source. Really that left FreeCAD. I did a tutorial or two on-line which were pretty great. I understood “parametric” and “fully constrained” finally \o/. But, it was time consuming to learn, and I was impatient. I printed up a laptop holder I found online. Time went on.
Recently I got some new mini servers (I’ll save the setup and install story for another blog post) and I wanted to mount them to the wall. I knew this would be pretty trivial to design a custom bracket if I’d learned FreeCAD well enough, but I still hadn’t.
I just decided to go for it, use TinkerCAD even though it was proprietary and online. Not ideal, but I got what I wanted! I made a two left and right brackets that held two mini servers against a plywood board. Perfect!
The point of this blog post is to let other folks know that they should just go for it – don’t let the tools slow you down. Once you see the power of creating something from nothing, and a physical something (not just software), you’ll see how empowering and inspiring it is!
I will say, you won’t get it right on your first try. I already knew this from some earlier prototyping I’d done, so I was ready for the 4 or 5 prints that failed before the final one succeeded. Don’t get flustered when, even after measuring twice before you cut print, that it’s still wrong!
So, here’s what I made:
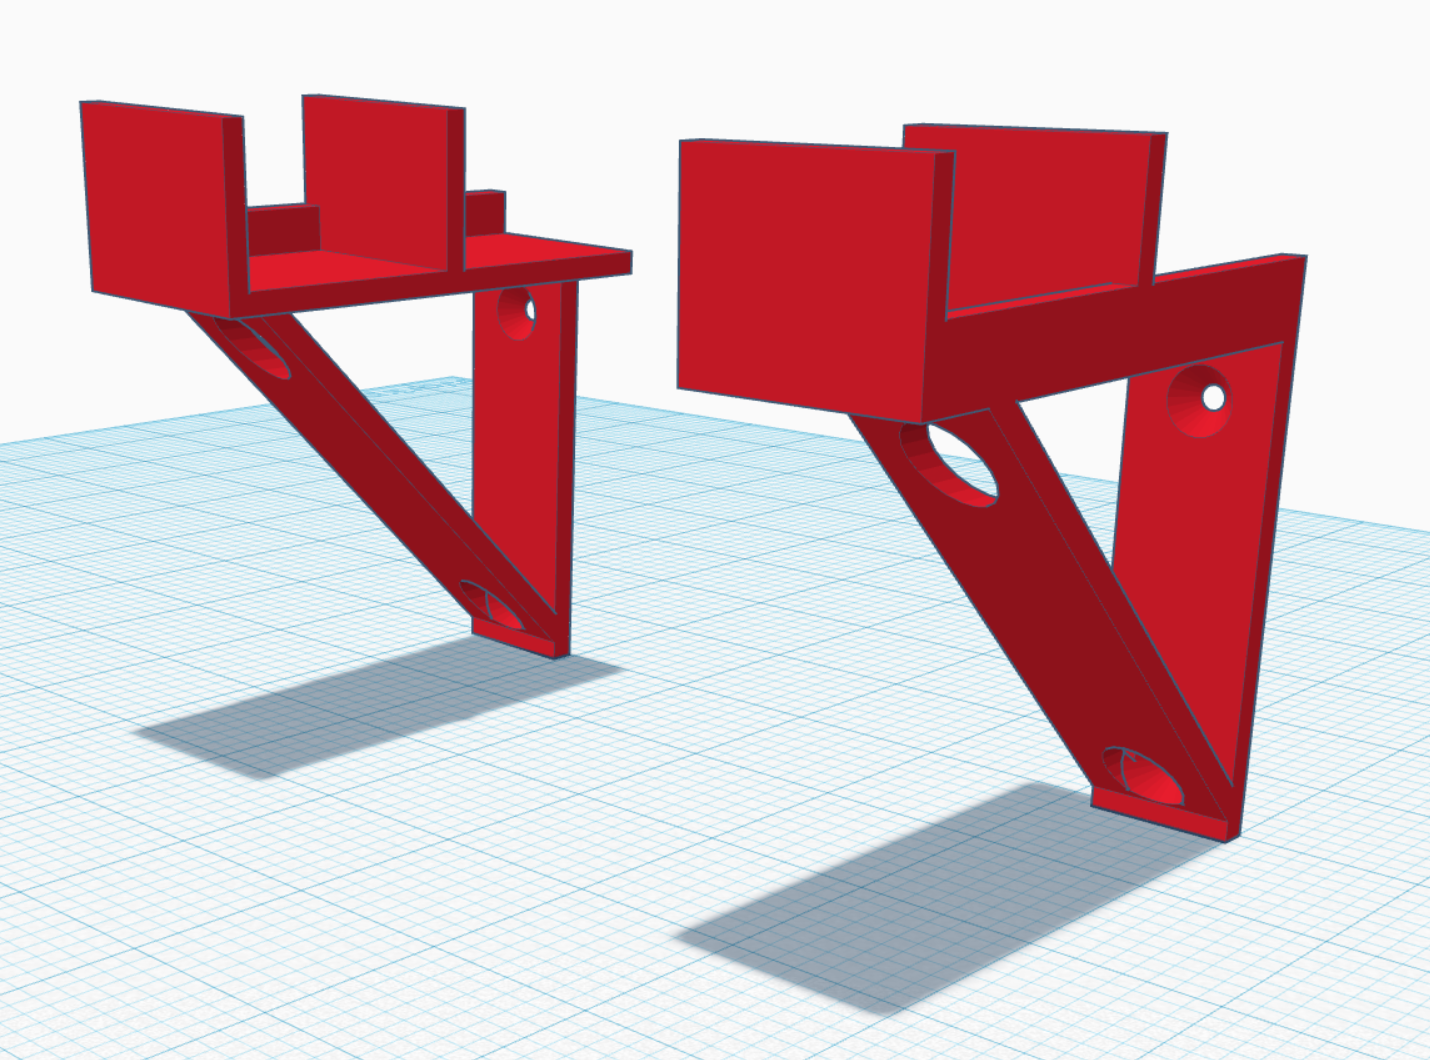
What you see here are two “L” type brackets that each can hold the corners of two mini servers. Note the hole through the cross brace that allows you to screw in the top screw (the first draft totally lacked this and it was nigh impossible to mount). These are of course rotated up in how you’d mount them, and in a terrible position to print.
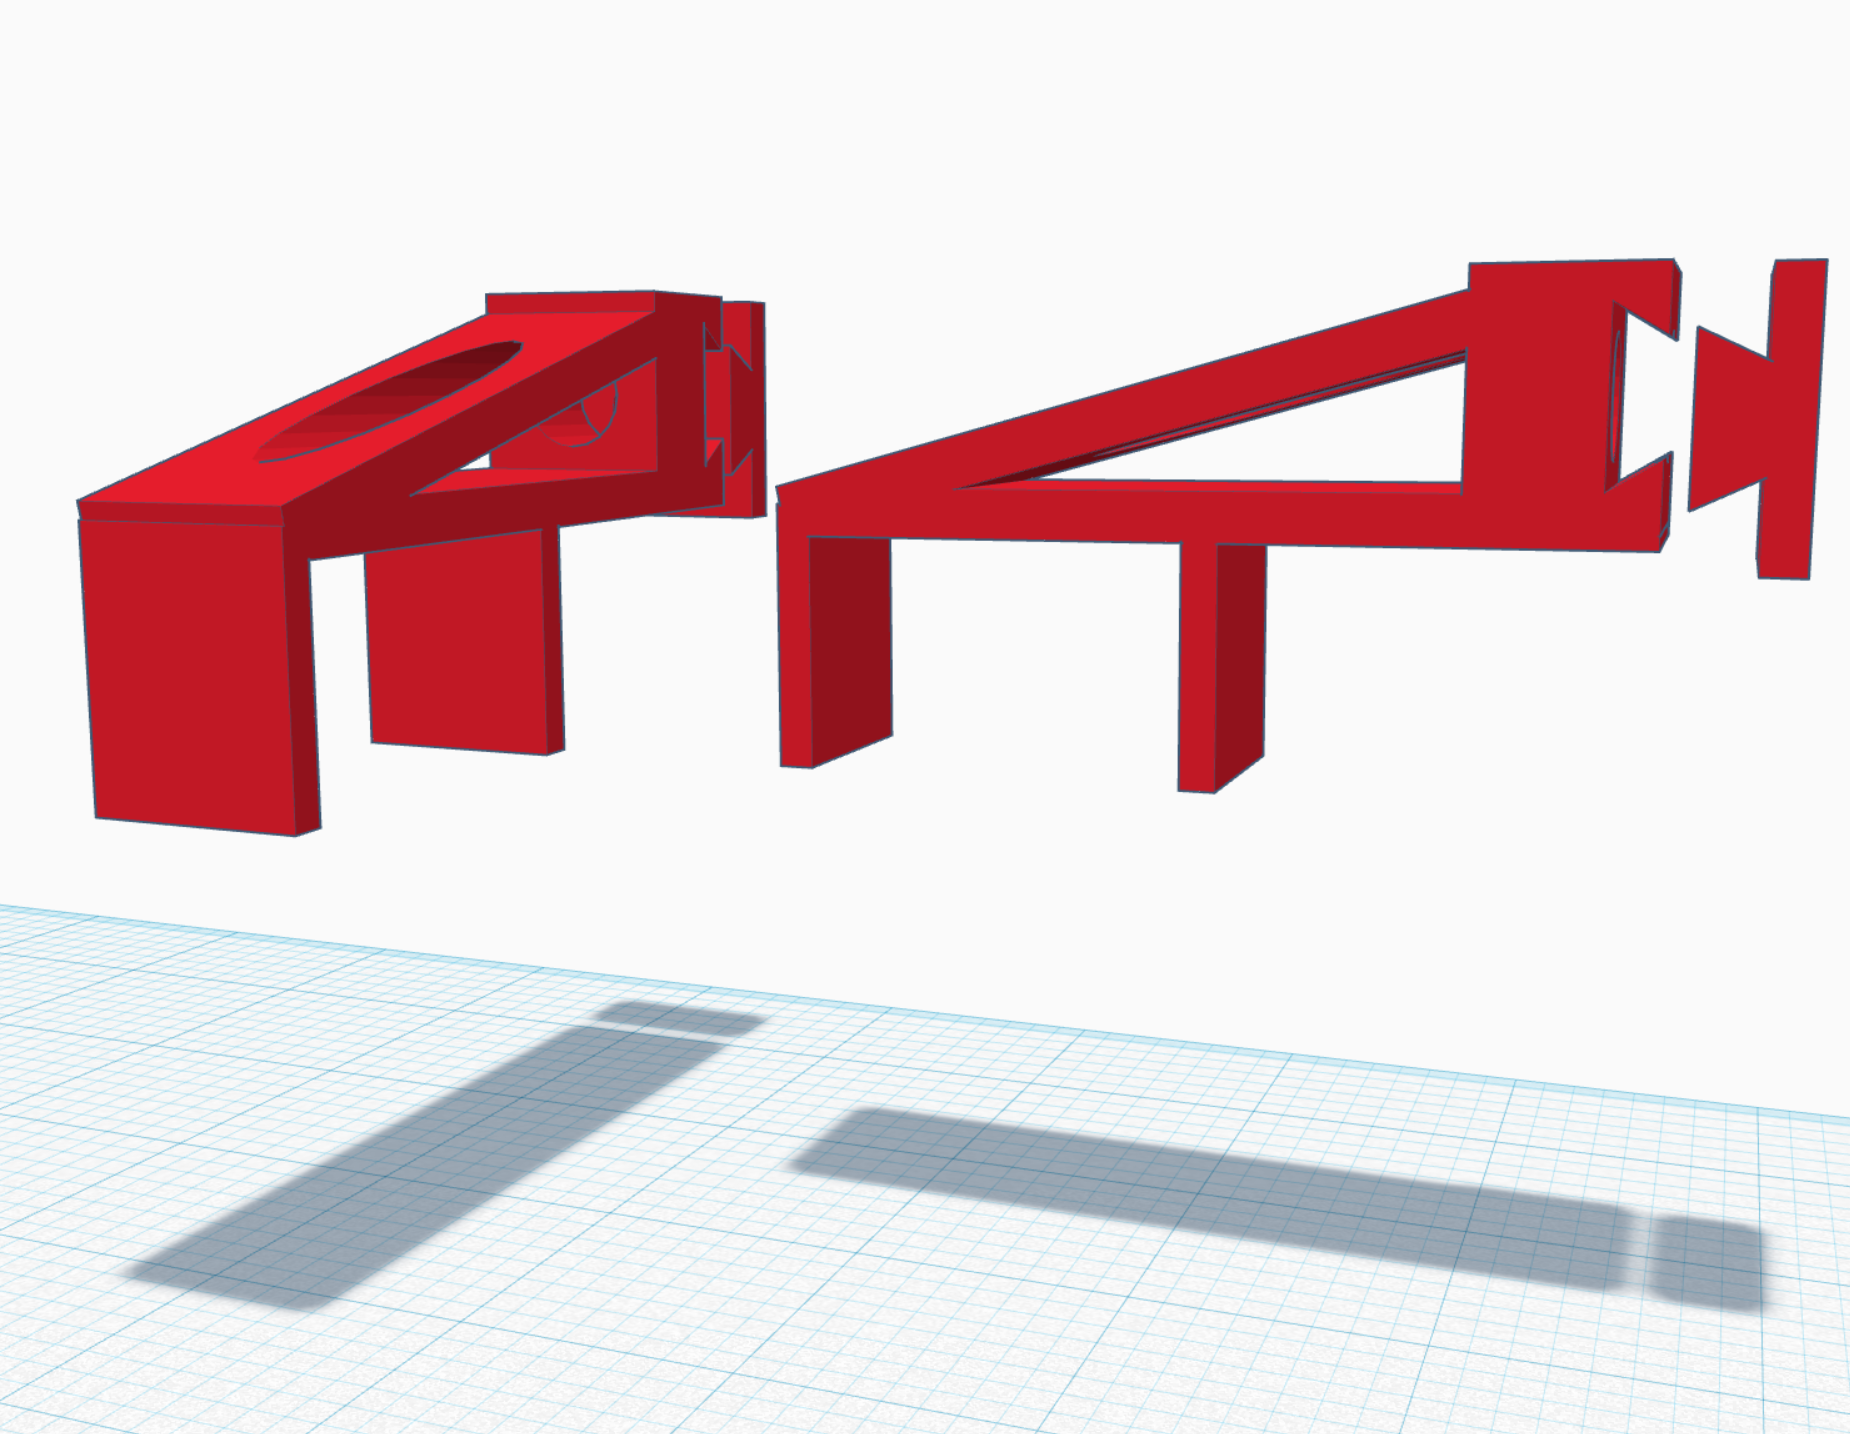
While these held the servers pretty well in place, there was still a chance they could tip forward off the wall, so I made a toolless top bracket to match. The nice thing is that you can screw this in as one piece, and the slide off the bracket from the screw mount. Some very light sanding was needed to ensure the two pieces slide together with just the right of amount of friction (showing two of them side by side, but only used one):
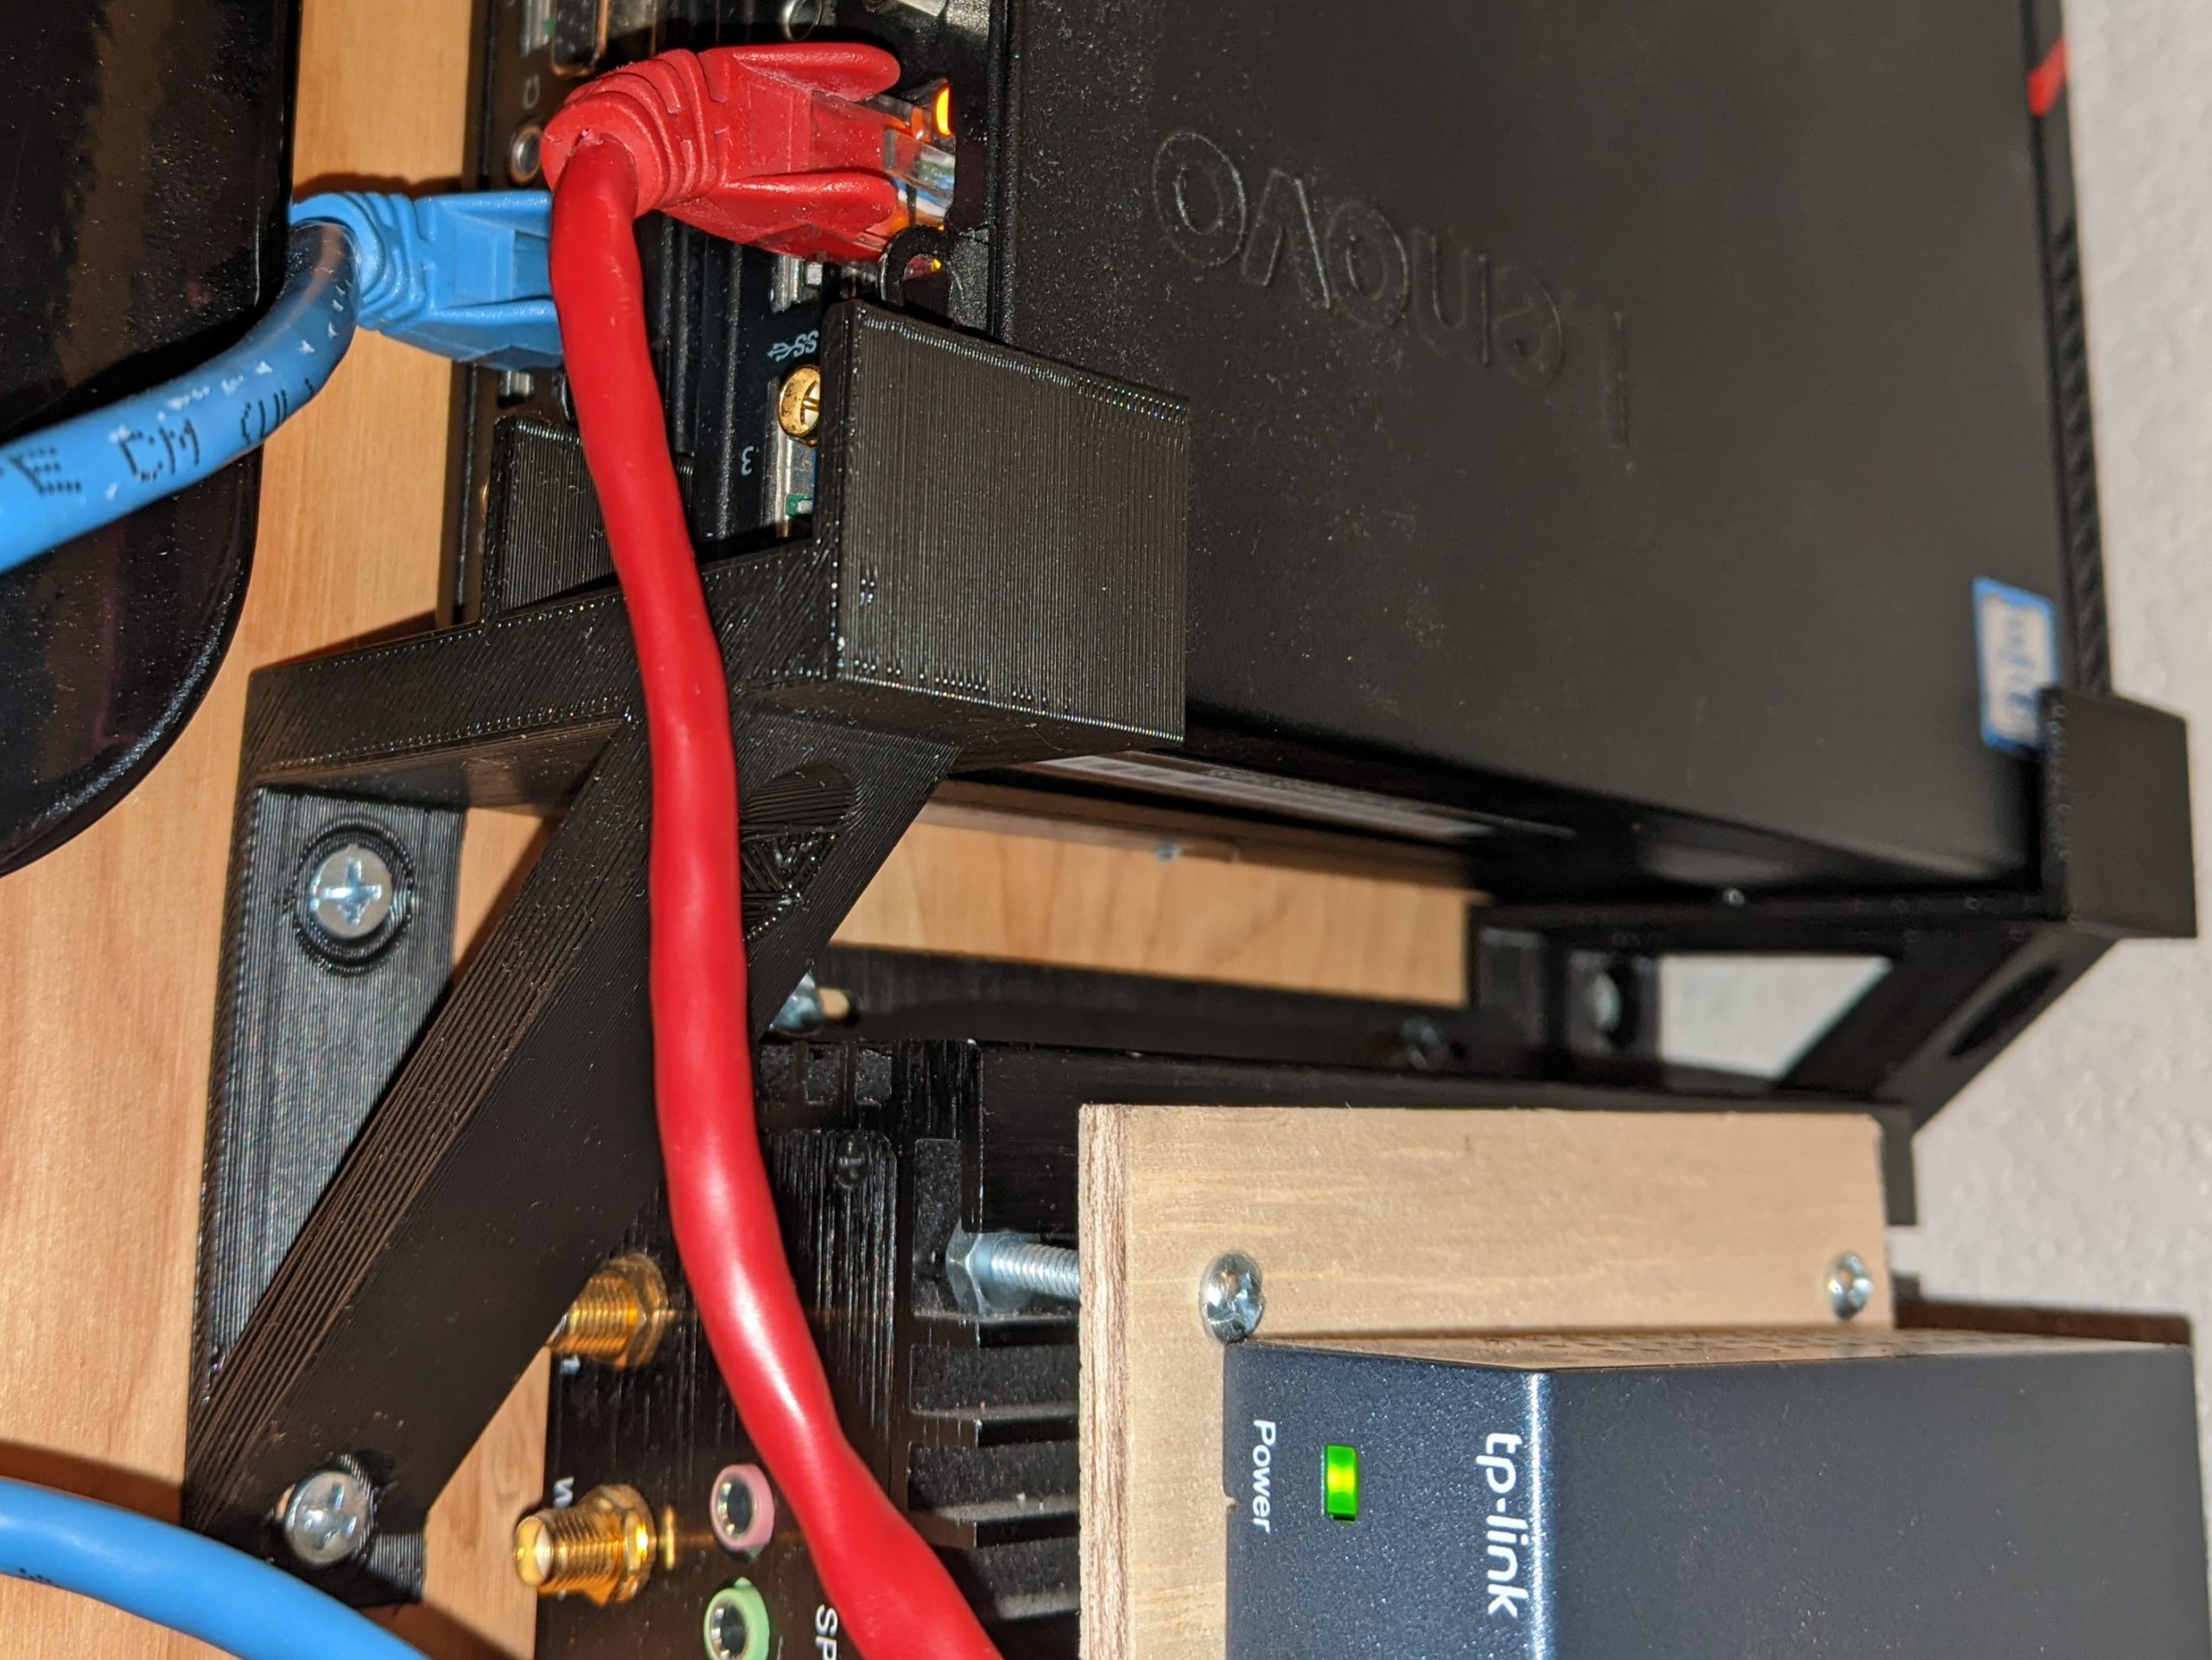
And here they are in situ:

If you have little servers and you want the STL, here’s the file and here’s the TinkerCAD link (which may go away b/c I’m not a fan of cloud services).
I hope if you’re thinking about designing your first part from scratch, you go for it!!