3 minutes, 19 seconds

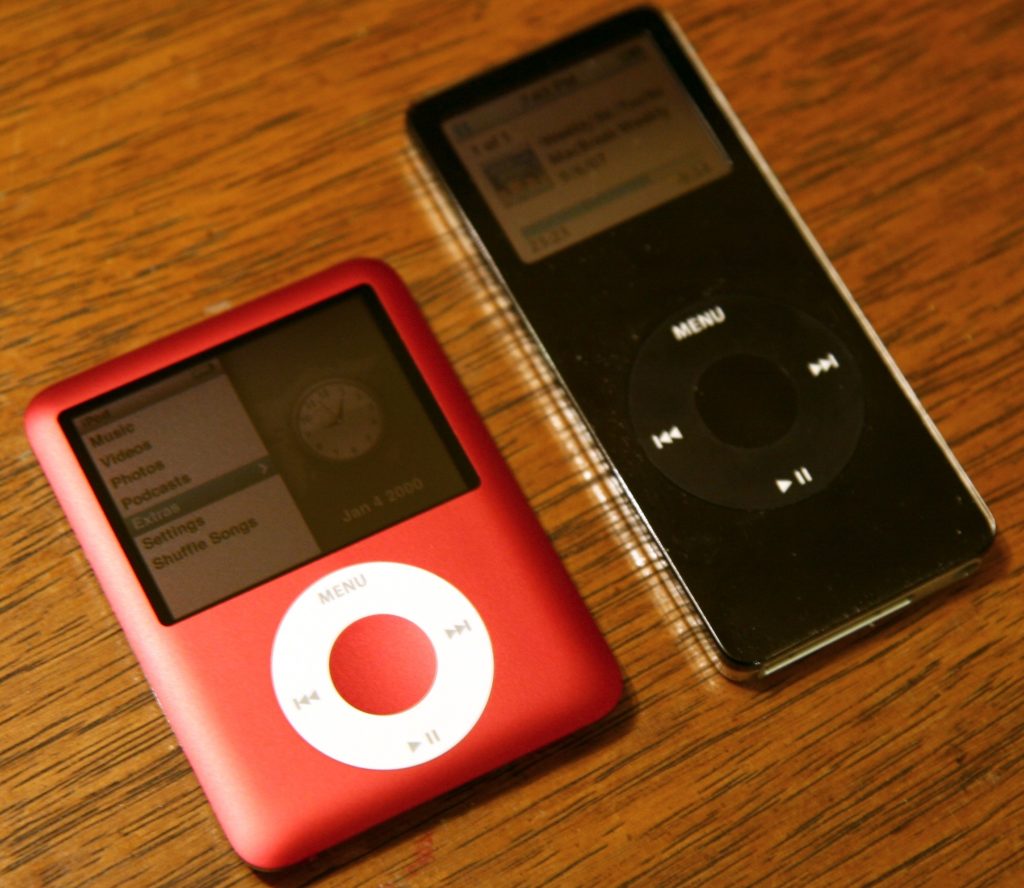
13 years ago we got an iPod to actually listen to music on the go. It was awesome! Some time later we had our first kid and some time after that smart phones became prevalent, so our iPod fell out of use. But it was about 9 years ago that we started to use the old iPod as an easy way to play the same a bedtime playlist for our kids (oh yeah, we had a 2nd kid at some point too ;). Soon, the kids split into their own bedrooms so we picked up a used iPod on eBay and loaded up the same bedtime playlist onto it. These two iPods dutifully played the same songs day in and day out every night for years. They’re even more utilitarian than designed, but worked well at their finite task (Photo by Nicnicoleleeolee):
However, over time things started to not work. First one of the fancy docks we used as a speaker stopped charging which ever iPod was in it. This meant every week or so we’d have to swap it over to the good dock to charge up. But then one started to lock up and had to be rebooted. We feared we’d have to replace them soon.
It was around this time that I starting using the Cast All The Things software (aka catt) in my quest to both (finally) learn Python and to easily control the volume on a chromecast. Checkout my cattmate and cattrotar projects! catt is a command line script and python library that allows you to easily control and play videos/music on Chromecasts. It was also around the time that Chomecast Audio’s were stopped being made so I’d stocked up them. We have about 4 or 5 plugged in here and there about the house, including one in each kids room. They work really well!
By now you can likely see how this post is going to resolve itself, but lets find out, shall we?
Yes, that’s right, I wrote a full featured web site that you could pull up and easily play music in which ever room needed to hear the play list. It was simple, yet fancy ;) On the front end there was a series of 2 buttons, one for each room. When you pressed a button, it sent an AJAX call to a to the single endpoint on the back end. The back end then made an exec call to a bash script. This in turn used catt to play a MP3 on the specified Chromecast.
This worked great for a day or so. But then a bug reared it’s ugley had. Let me tell you, the cost of a software bug in your web app which involves waking your child up at 10.30pm is EXTREMELY high. Like, unacceptably high. Sleeping children are gold. Parents get grown up time, the kids get much needed rest and we’re all better for it the next day. Don’t fuck with a kid’s sleep.
After some unfruitful debugging, I got lazy and realized I’d already installed the wonderful termux on my phone, along with a $2 add on to have a bash script launcher widget on my phone’s desktop. So, after a dozen or so minutes of coding and a little ssh-keygen -t ed25519 for good measure, I had this on my phone:
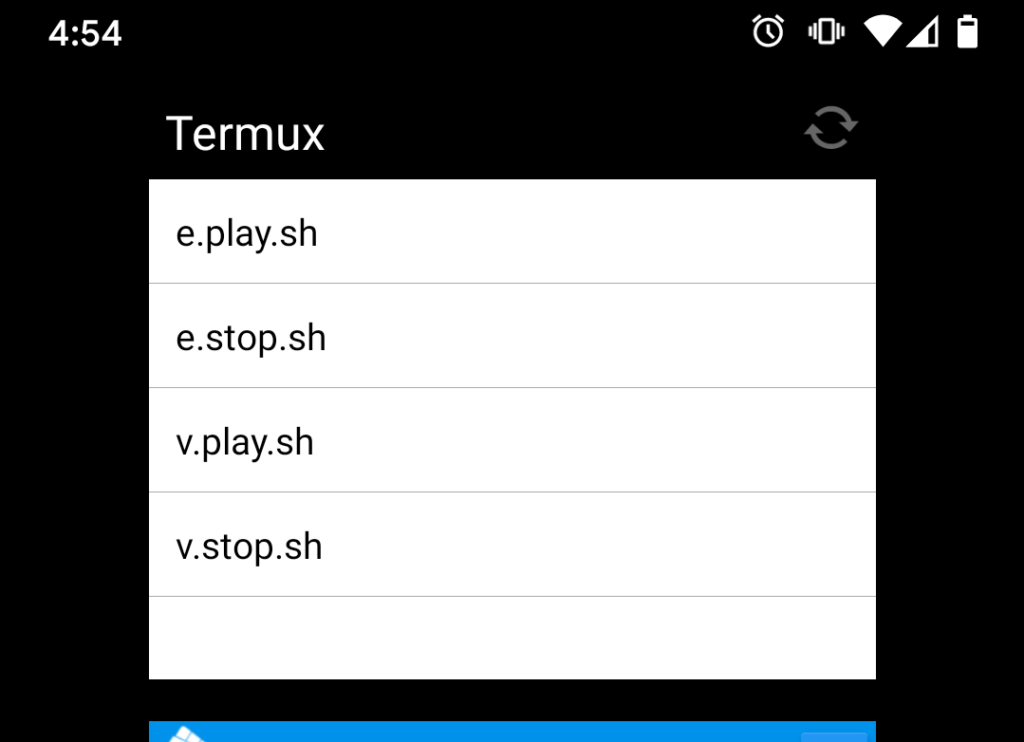
Here’s what happens when you press one of those four links:
- Call a local script on the phone with the same name shown above
- Each script has the same contents but just calls the remote server with a different argument:
ssh napserver controlmusic.sh CHILD PLAY_STOP. So for the first one above, that’d bessh napserver controlmusic.sh e play - The remote server, (hardened of course to only allowing one command to be run for that SSH key,) inside
controlmusic.shruns acattcommand:/usr/bin/catt -d DEVICE COMMAND OPTIONAL_COMMAND. Again for the first button that’d look like:/usr/bin/catt -d "E's Chromecast" cast songs.mp3
So, while not nearly has fancy as the web app I initially wrote, it works every time, has saved me the time of debugging the web app (aka let me be lazy ;) and most importantly, does not wake the kids up after they’ve gone to sleep! Icing on the cake is that continued my lazy streak and bought the app for my partner’s phone so they could activate the playlist while I’m out of town (instead of me VPNing in and activating it remotely on request ;).