Category Archives: Tips

How to test PHPs memory_limit setting

0 minutes, 42 seconds

So, we all know that in PHP, you configure it with a php.ini file. And in there, you can set the amount of RAM a script can use with the memory_limitsetting (remember this is “M” not “MB”!).  And if you get this error:

PHP Fatal error:  Allowed memory size of 134217728 bytes exhausted (tried to allocate 234881025 bytes)

Then you can increase the memory_limit to be larger (don’t forget to restart apache!). However, what if you want a script to hit that limit to see how your error logs and such are set up?  I had more fun than I thought I would writing a textbook solution to a textbook problem.  Here it is in it’s 4 line glory:

$str = 'memory!';
$i = 1;
while ($i++ != 100) $str .= $str  ;
print "done!";

When you run this you should see an error as this will exceed 128M of memory. If not, so salt to taste ($i++ != 200) if you run with a higher memory_limit setting!

On really nice standing desks with really nice computers

3 minutes, 53 seconds

A good friend of mine is setting up a new workstation in his new lab and wanted some advice on what would be the best setup. Being a bit of a geek about monitors and having set up my own desk, I had a lot of ideas on this. After a detail-packed email to him, I realized it’d make a great post for others looking to do the same thing.

The overall question I got: What would be the best standing desk with the best monitors for a new Mac Pro (nMP)?

This is fun!  I get to spend imaginary money for a dream set up.  For my “what’s the best” type of questions, I always try to refer to  The Wirecutter, they’re great. As well, I try to use Amazon whenever possible for all of my shopping needs

The Desk

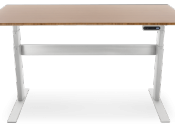
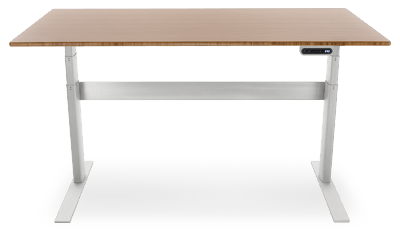
Though Wirecutter has a newer, cheaper recommendation, I still like their step up, the NextDesk Terra, which was their “regular” recommendation when I got mine. I see it’s now down to $1,500.terra

NextDesk upgrades: You can get a ton more bells and whistles including CPU stands, software integration, casters, batteries (for use when moving on casters) and more. The bare minimum I would get is the “Power Management,” which is really well done. Also – think on whether you want the hole(s) for cables in the desk. I regretted getting a single center one. I might have gone with none or two side ones.

Monitors and Stands

stands
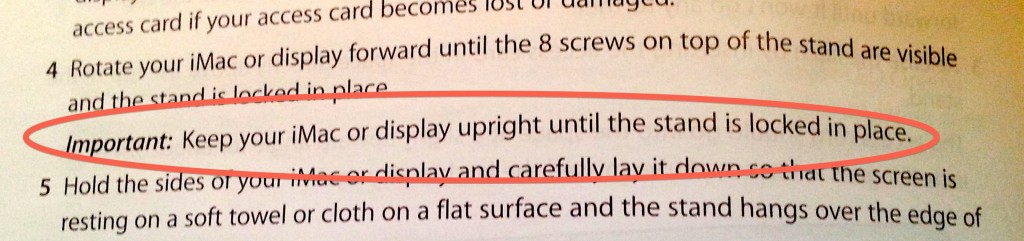
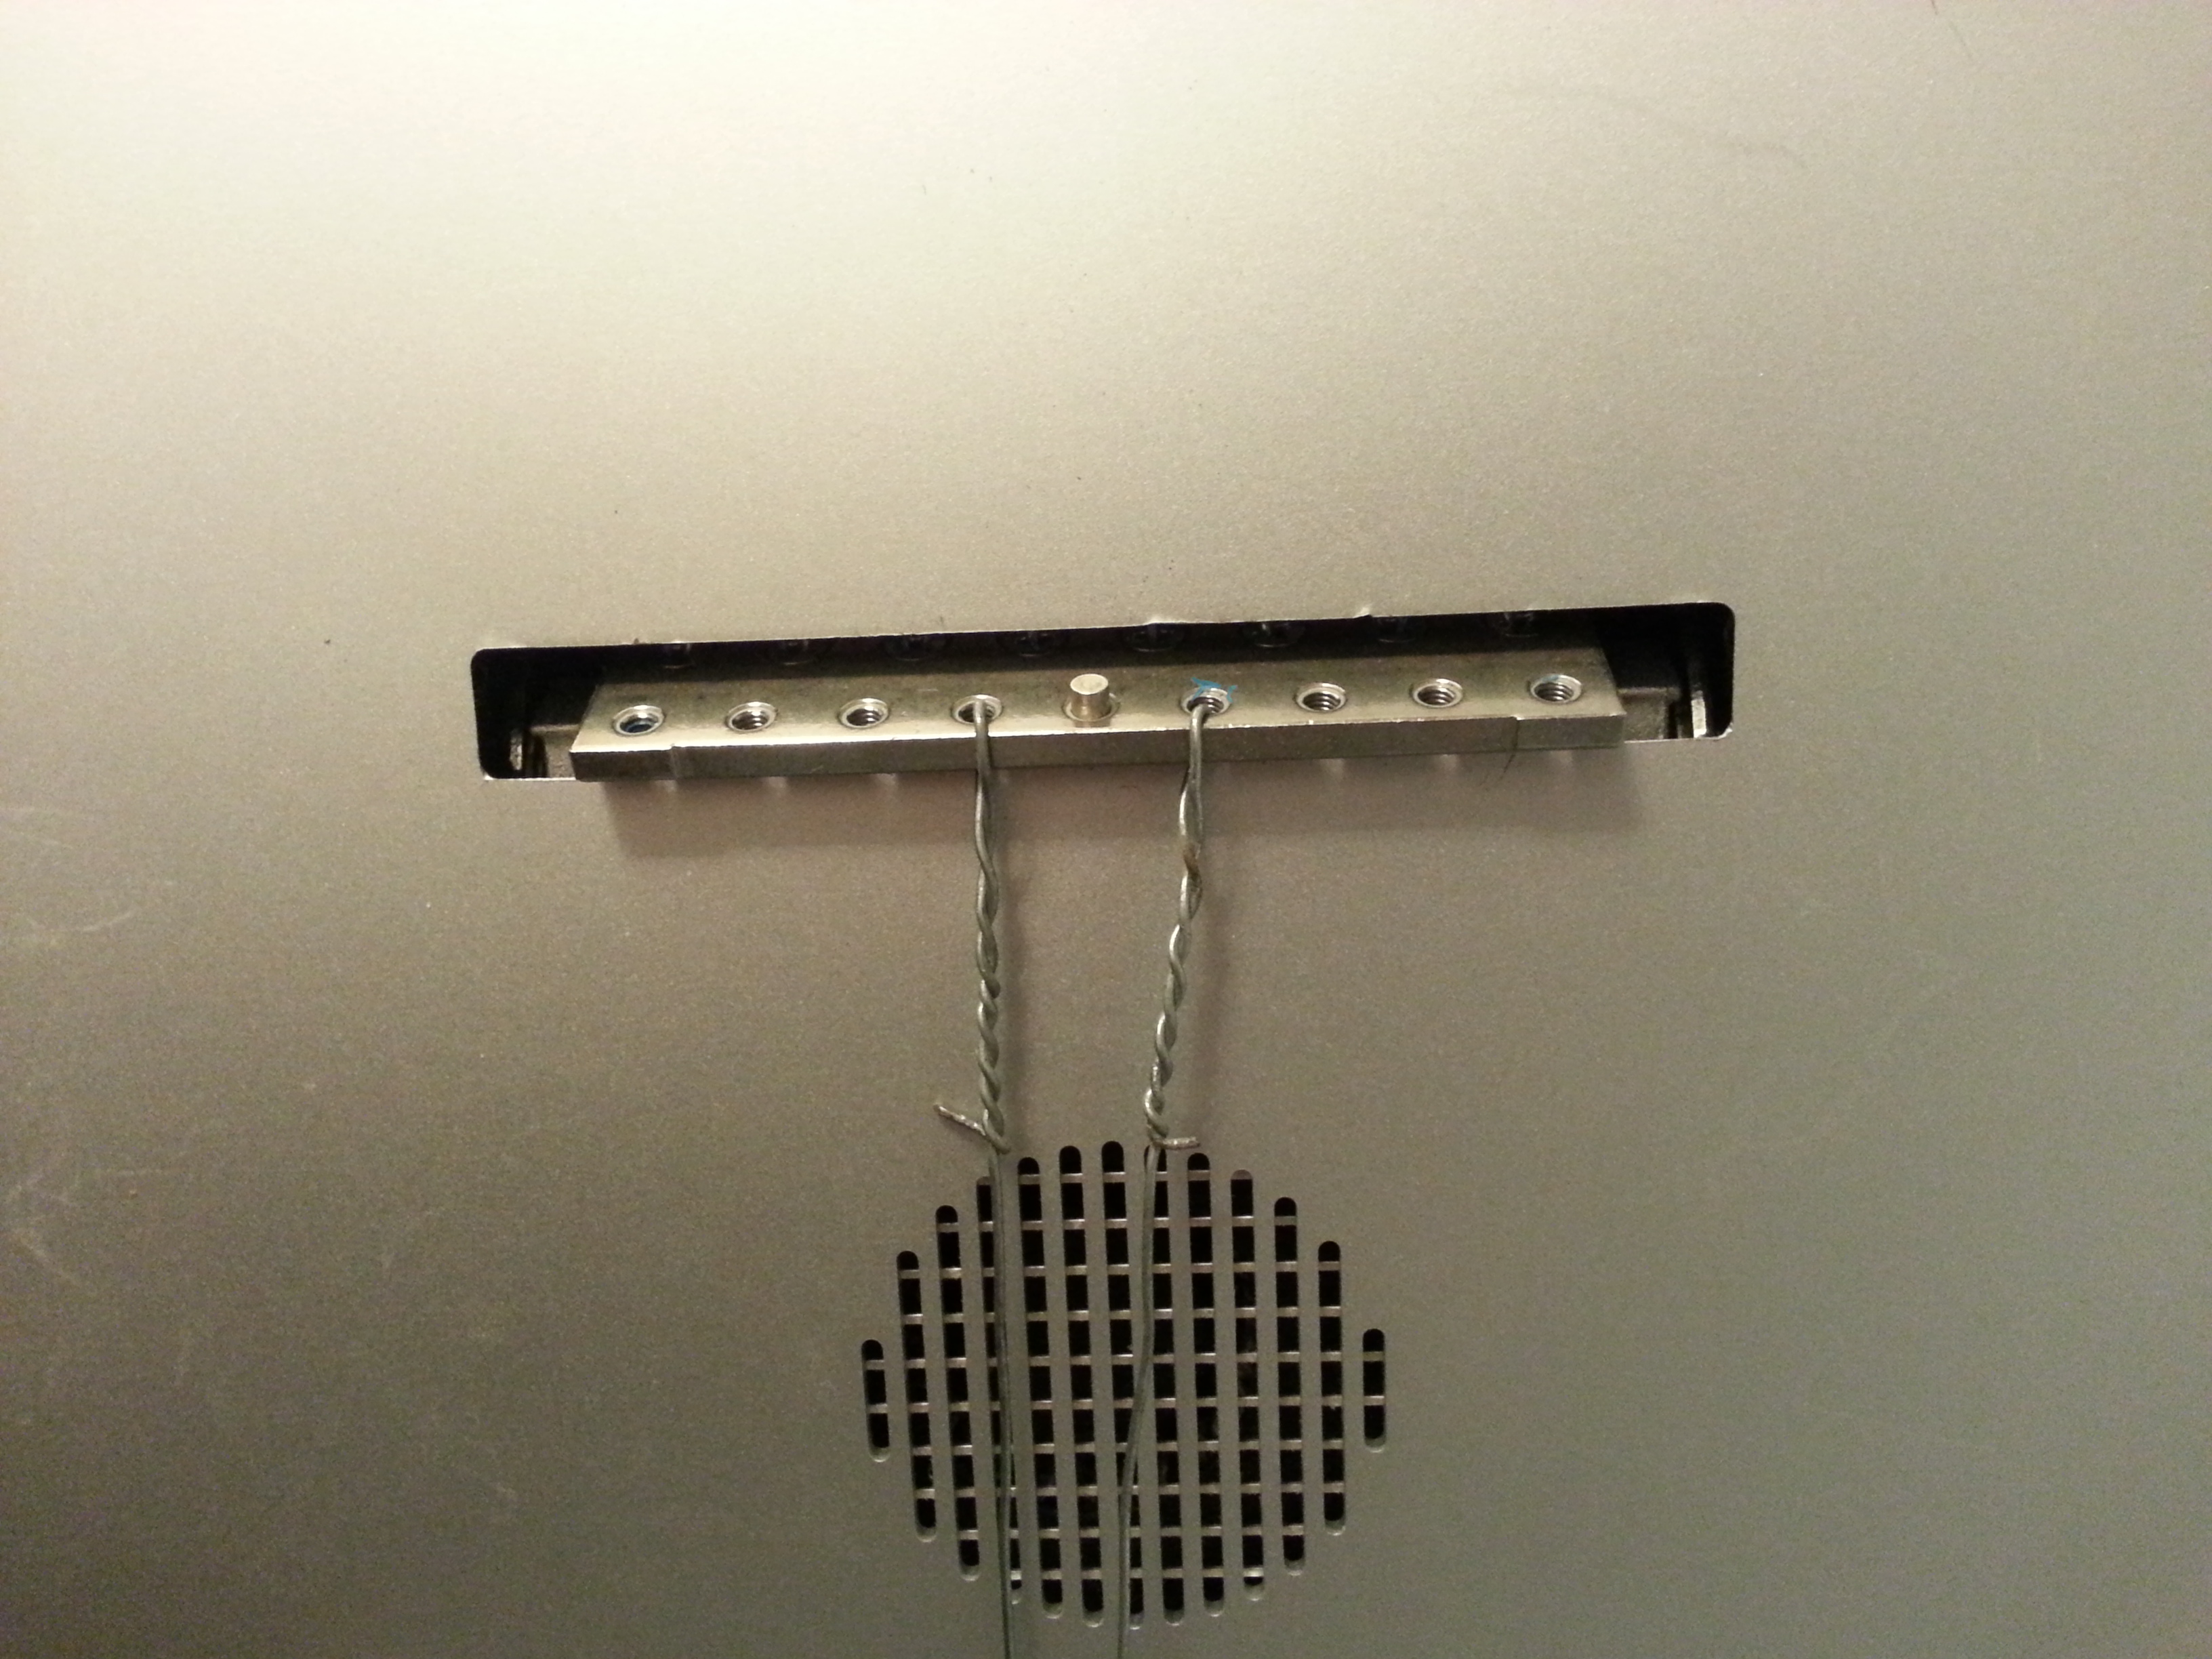
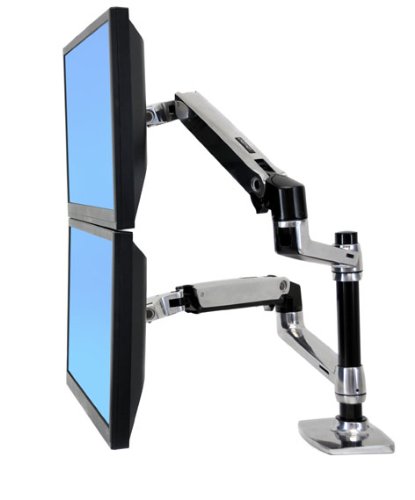
I use Ergotron’s single and dual arm mounts. Amazon pictures the dual with two monitors on top of each other, but it can easily do two side by side (as well, they rotate for one portrait and one landscape). You can also order the single and then add a second arm to the same pole at a later date if you decide to add another monitor.

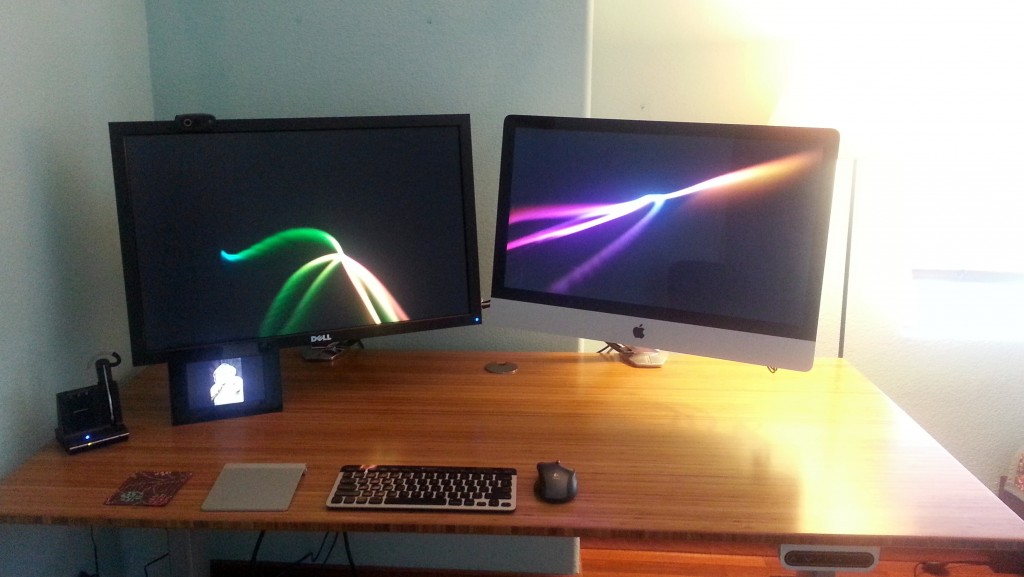
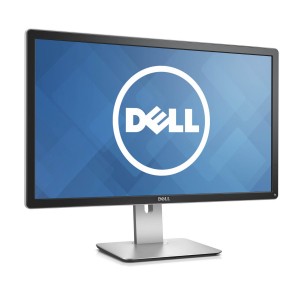
IPS 60hz 4k displays used to be $3,000+.  This is no longer the case! The Dell P2715Q 4k 27″ is down to $500! This is insane. You could get two of these no prob for your Mac Pro. IPS means that the viewing angles are perfect.  60hz means that the refresh rate is super fast and your mouse/window movements don’t feel sluggish.  dell4k means that you can either run HiDPI for super crisp text or 1:1 for TONS of real estate. Well, assuming you have good eyes for the 1:1 ;)

Though 4k is ready for prime time, there are a few bumps in the road, specifically around displaying the boot process. As well, I see Apple’s nMP page boldly advertises “connect up to three high-resolution 4K displays.” However, I’ve also seen reports that the 3rd will be only at 30hz (boo!).

I forget which cables Dell comes with, but you can always get a 3, 6, or 9 foot (or more!); it’s nice to have the perfect length cable with no extra slack. cableSame for ethernet, USB, firewire and thunderbolt cables too! For example, here’s a 6ft mini display -> display port cable for just $7. Oh yes – don’t use any ugly looking dongles!  Get the right cable for the job.

Mac Pro and peripherals

I don’t actually have a new Mac Pro (aka nMP aka 2013 Mac Pro), so I don’t have too much to say about which CPU and GPU to get.  However, I did just get a 5k iMac that works great with the Dell         4k display! (Well, as long as you don’t mind some UI degradation. Ok, not so great, but worth the trade off for me.). To save money on the most expensive item in this monster desk setup, I strongly recommend using refurb.me – they’re the best way to effortlessly get good deals on Apple refurbed products! These are direct from Apple and include an Apple warranty.

mac.proOne new Mac purchasing trick I did learn is about buying your new Mac with more RAM direct from Apple.  Don’t do it! For example, 64GB of aftermarket RAM only costs $664 instead of Apple’s $1,300. ramConsider putting the saved money toward more cores or disk or graphics card! I love Crucial for cheap aftermarket RAM, but I usually end up buying their stuff on Amazon. Here, B00GEC3ZJQ on Amazon is cheaper than the exact same part (CT5019226) on the Crucial site. Order two kits to max out your nMP to 64GB.

Keyboard and keyboard mouse – I love Wirecutter’s recommendations for wireless versions of both mice and keyboards. They really add to the clean lines of VESA stands on the awesome desk.mouse

Despite loving the wireless mouse and keyboard, my new boss got me a “welcome to your new job!” gift of a fancy Das Keyboard 4 Pro which I NEVER would have bought on my own given it’s price. If I had office mates, they NEVER would want me to use it because it’s too loud. That said, I actually love this keyboard so much that I alternate it with Wirecutter’s bluetooth pick, but the cable does ruin the lines of your desk. ;) Oh – I see it comes in “soft tactile” model as well. This might be a more quiet option!

das.keyboardI love following this topic so drop me a note if you have any questions or want to update me with your experiences in this area!

Named anchor navigation using JavaScript

1 minute, 31 seconds

Recently I wanted to implement simple way to load a number of gallery images on an a static HTML page.  JavaScript was my go to, specifically jQuery.  I started by including jQuery on my page:

<script src="//code.jquery.com/jquery-1.11.2.min.js"></script>

After noodling on which way to build this, I decided to use the anchor name (“#”) in the URL.  We register a jQuery listener like this:

$( document ).ready(function() {
    $(window).on('hashchange', function() {
        changePhoto();
    });
});

What this code does, is on page load (“ready()”), we listen to changes to the “hashchange”.  When we hear a change to the anchor name, run the “changePhoto()” function.

I then have a single img HTML tag which we’ll update:

<img  id="changable" src="Image1.jpg"  />

And some links which control which image the user can see:

<a href="#" class="go-photo" photo="1">Photo 1</a> - 
<a href="#" class="go-photo" photo="2">Photo 2</a> - 
<a href="#" class="go-photo" photo="3">Photo 3</a>

To handle these clicks, we just have a function which looks for the “go-photo”:

$('.go-photo').click(function(e) {
        e.preventDefault();
        window.location.hash = $(this).attr('photo');
 });

This simply intercepts the default action of clicking a link and instead updates the anchor based of the ID of the “photo” element in the link.  Any time the hash is updated in the URL, our listener will fire our own “changePhoto()” function.

Finally, we have our changePhoto function which handles changing the image source upon a hash change in the URL:

function changePhoto( base){
    photoid = window.location.hash.replace("#", "");
    $('#changable').attr('src', 'Image' + photoid + '.jpg');
    return true;
}

And, bam, you have a tidy, JS based photo navigator. My main goal of having both a JS call to change the anchor and the browser back button  trigger a call to changePhoto() as achieved. To add a new photo to your page, just upload a new Image4.jpg image and add a new link with the right “photo=4” value and you’re good to go!

Tip: Better Amazon URLs

0 minutes, 52 seconds

Have you ever had a friend send you an Amazon link that was all kinds of long and ugly? Maybe it looked like this:

http://www.amazon.com/Princess-Tiana-Balloon-Bouquet-Balloons/dp/B00BIIAUY4/ref=sr_1_1/187-3169712-6163024?s=toys-and-games&ie=UTF8&qid=1421967348&sr=1-1

Thought you can clearly see it’s for some sort of balloons by the “Princess-Tiana-Balloon-Bouquet-Balloons” part, there’s a bunch of referrer tracking junk in there after that.  It’s very ugly.  As well, maybe you have 3 or 4 balloons you’re thinking of getting and want to send them to a friend with the price and if it’s Amazon Prime or not.  Enter the tip!

You only need 3 parts to the URL for it to work:

  1. Domain: http://amazon.com
  2. Vanity Name: Princess-Tiana-Balloon-Bouquet-Balloons
  3. Product ID: /dp/B00BIIAUY4

The three takeaways are that you A) don’t need all the junk at the end, B) the domain can drop the “www” and, most importantly, C) can put what ever you want in the vanity section. In our case, we could make that ugly ol’ URL all purty and helpful and it still works just fine:

http://amazon.com/11buck.no-prime.tianna.balloon/dp/B00BIIAUY4

Root on Verizon Galaxy S5 on NK2 Firmware

4 minutes, 19 seconds

Galaxy-S5After my S3 took a quick, but not quick enough, drink in the kitchen sink, I upgraded to an S5. It’s a really great phone. However, I had been running Cyanogenmod 11 on my S3 and I missed all the perks of root access. I’ve rooted my S5, and it’s awesome. Here’s a write-up for those who want to know how to do it. In my guide below, I take a bit more time than some of the threads in XDA to describe each step, which will hopefully make it a bit more beginner friendly.

Rooting is always a bit of a risk and ***YOU SHOULD NOT DO IT UNLESS YOU ACCEPT THE RISK OF TURNING YOUR PHONE INTO A PAPERWEIGHT***. Also, though, you already have a good backup system, (right!?), ***BE SURE YOU HAVE A BACKUP OF YOUR DATA ON YOUR PHONE***. With those warnings out of the way, root was a snap following bdorr1105‘s excellent write-up on xda developers. On top of it all, I had zero data loss as the root process doesn’t require you to reset android, which was super handy.

Preparation:

  • Have a windows machine and install Odin on it.
  • Double check you’re on NK2 baseband: Settings -> About Phone -> Baseband version -> last 3 characters are “NK2”.
  • Install latest Samsung USB drivers on your windows machine
  • Download both G900V_NCG_Stock_Kernel.tar.md5 and NK2_Firmware_Only.zip to your windows machine. Extract the NK2 zip file so it’s an md5 file (extracts to NK2_Firmware.tar.md5).
  • Have a micro USB cable
  • Allow unknown sources on your phone: Settings -> Security -> Unknown sources – checked
  • Read through all these steps and prep items. Ask questions *BEFORE* you start if you’re confused.
  • If you’ve never used Odin, maybe check out this youtube video to see how it works. There’s a 1080p option, and you can really see exactly which buttons to click and what Odin looks like in action. Note: the steps in this video differ from mine and you shouldn’t follow the video’s steps; follow mine instead. The video is for NI2 not NK2.
  • Be patient. Don’t get frustrated!

At a high level, we’re going to be doing 4 things which I’ll label below broken into 12 steps:

  1. Prep root kit: Installing a the towelroot root kit. Steps 1 and 2 below.
  2. Revert: Reverting back to the old NCG kernel/baseband which is vulnerable to a root kit. Steps 3 through 7 below.
  3. Root: Rooting the phone. Step 8 – just one easy step!
  4. Update: Updating back to the current NK2 kernel/baseband. Steps 9 through 12 below.
Odin v3.09 configured to install Ni2 firmware.

Odin ready to install NI2. Click to see larger version.

Now, the steps, again from the great guide that bdorr1105 wrote:

  1. Prep root kit A: Install Towel root to your phone. To download the APK, open Chrome and go to towelroot.com. Hold down on the big red lambda icon and choose “Save Link.” When you click the link in Chrome it creates an infinite redirect. If you click it in Firefox, it loads the text of the APK in the browser instead of saving the file :(.
  2. Prep root kit B: After the download, click the APK and install it. Also, add a shortcut of the towelroot APK to your phone’s home screen so that it’s easy to launch (more on this later).
  3. Revert A: Put your phone in Odin mode: hold down power button and then choose “Restart.” When the phone turns off, hold down power button, home button(button on front) and down volume at the same time. When prompted, choose to continue by pressing up volume.
  4. Revert B: Connect your phone to your laptop with the micro USB cable and launch Odin. If this is the first time you’ve connected your phone in Odin mode it might take a few minutes to find all the drivers. Possibly even longer. Be patient!
  5. Revert C: Once your phone shows up in Odin in the upper left in the ID:COM section (see screenshot), click the “AP” button and navigate to where you download the “G900V_NCG_Stock_Kernel.tar.md5” file. Click “Start.” Your phone will show a progress bar on the screen, and then it will reboot. Once Odin app says, “PASS” in green, unplug your phone.
  6. Revert D: Your phone will reboot and update the apps. This will take a few minutes.
  7. Revert E: Once it’s done updating, your phone will be slow. A ton of apps will force close. This is expected. Click “OK” or “Close” to any dialogues that pop up.
  8. Root: Click on the towelroot icon we made on the desktop. Click “make it ra1n” and wait. Towelroot will confirm you have root.
  9. Update A: Restart your phone and hold down the down + power + home buttons. Press up to get into Odin mode again
  10. Update B: Plug your phone in to the USB cable again. In the Odin app on your computer, press “AP” button and select “NK2_Firmware.tar.md5”. Click “Start.” Your phone will show a progress bar on the screen, and then it will reboot. Once Odin app says, “PASS” in green unplug your phone.
  11. Update C: Your phone will reboot and update the apps for a second time. This will take a few minutes, same as before.
  12. Update D: Go to the Play Store on your phone and install “SuperSU.” Open and choose to install SU. When prompted, choose “Normal” mode instead of “TWRP.” When prompted, disable Knox and reboot.

You’re done, congrats! You can install “Root Checker Basic” if you want to have warm fuzzies of seeing you have root. To clean up, go back into settings and uncheck “allow unknown sources” as well as uninstall towelroot. Google will flag this as an unsafe app and ask you to uninstall it anyway.

Trick to easily reload that Chrome App you’re developing

0 minutes, 30 seconds

I’m working on a chrome app. Maybe you are too! Maybe you want to do the old view-the-app-command-tab-back-to-editor-make-quick-tweak-save-command-tab-back-to-the-app-and-want-to-quickly-reload thang? Maybe you can’t reload your app quickly, like a good ol’ web page with “command + R” (or “ctrl + R” on windows)? Maybe you even saw that there’s a bug on file to fix this?

May I introduce the triple escape hack! If you add this snippet at the top of your app, all you need to do is hit the “esc” key 3 times and your app will reload:

var escCounter = 0;
$(document).keyup(function(e) {
    if (e.keyCode == 27) { 
	  escCounter++
	  if (escCounter > 2){
		  chrome.runtime.reload()
	  }
    }   // esc
});

Feel free to salt to taste with other key combos!

Addendum to “Ashley’s Law”, problematic iMac VESA mounts and new desks

2 minutes, 29 seconds

I’ve been thinking recently about items you use a lot in life. For example, the internet thinks we sleep for 20+ years in our lifetimes[1][2]. As well, the internet suggest a person with a desk job will spend 80k hours sitting [3]. What does this mean? It means that you shouldn’t skimp on your mattress and your chair! In fact, you should buy the best mattress you can afford. Well…no, you should by the best mattress on which you sleep well and should try to not be price conscious. Same for your chair and your desk. So if you recall Ashley’s Law said:

If you don’t have it, you can’t use it.
– Ashley Jones, 2011

So the addendum would be:

If you’re going to use an item for more than a 1/4 of your life, it should be a quality item you didn’t skimp on.
– Ashley Jones, 2013

The list of applicable items should be quantifiable! Despite having recently purchased not one, but two cars, I would say for most folks they don’t spend 1/4 of their lives in their cars. So, unless you’re a trucker, my advise is to not spend a lot of money on your car.

Speaking of this new addendum, I wanted to set up my iMac to be mounted on an articulated arm on my desk so it could be be the perfect ergonomic height when I work on it for hours a day (8+). This would also giv my desk those really clean lines with the monitors floating over the surface. Here’s my advise to those who want to also endeavour to have this setup:

  • The $115 Ergotron MX will indeed support a 2012 30lb, 27″ imac[4]
  • Be sure to get the iMac VESA mount[5] and not the Cinema Display mount which is cheaper[6]
  • Read the instructions for your iMac VESA mount carefully.
  • Especially the warning after step 4:imac.VESA.warning
  • If you don’t follow this step and after you take off your iMac stand you see the VESA mount suck back into the dark depths of Mordor[7] otherwise known as the inside of your iMac, chill out. Go down stairs and grab a cold beer. Crack off that top, take a nice long sip.
  • Back with your beer? Great. Skip the the top search result[7] which you find where they say you’ll have to disassemble your entire iMac and void your warranty to get your VESA mount back out:

    Hopefully you can fish the inner bracket back up and out the slot, because if not the iMac may have to be completely disassembled to recover it.

  • Take another sip of beer.
  • Check out the post waaaay down yonder in the search results. That’s right, the one with pipe cleaners[8]. See? You’ve got those supplies in your house to fetch that nasty guy back out. Here’s another variation that I came up with:vesa.retreval.2vesa.retreval.1

    Yes, that’s right, using some needle nose pliers, some picture hanging wire or what ever else you have around the house, you retrieve your precious and get back to setting up your desk.

After heeding my own addendum, following the wire cutter’s advice on standing desks[8] and recreating the “you can’t stump me, I’m the internet” solution to get my VESA mount back, I have a great desk set up that’s really quite nice. I highly recommend treating yourself right with the items you use the most:

newdesk

Swappa.com is an awesome site to sell or buy Android phones

1 minute, 24 seconds

I recently discovered Swappa. This is great site to sell or buy an Android phone. Why? First off they only sell good condition phones with clear ESNs. You won’t find any “only good for parts” deals here. As well, every phone posted for sale is verified by an actual employee at Swappa, so there’s no scammers. Further, they have lower fees than ebay.

However, I take the the blawg-o-sphere today because of their amazing customer service. The other day my one year old and I were hanging out by our pool. When he thought I wasn’t looking, he jumped in (ok, fell in) the pool, face down. Only thinking of ensuring my son didn’t drown, I jumped in and pulled him out. Only afterwords did I remember my Galaxy SIII in my pocket. After a week of letting it bake in the sun and still no speaker or mic working, I deemed it dead.

I went to Swappa, found my replacement phone, and purchased it. It was easy to find the exact phone I wanted, which even came rooted and with CyanogenMod 10.1. The seller told me it would ship out the next morning.

On a whim I powered up my old, left for dead phone. Oh my gosh! It totally worked! I even stuck my SIM card in there and I could make calls with the speaker and mic working no problem.

I embarrassingly asked the seller and Swappa if I could back out of the sale. Both agreed to help me out. The seller refunded my money, keeping $20 at my request. Swappa even refunded my buyers fee, which I had said they could keep. This all took hours and was tended to by the same Swappa employee who had verified the phone for the initial sale. What service!

I could not give them a higher recommendation and plan on purchasing all my phones from them. You should too!

How much should you trust the cloud?

0 minutes, 57 seconds

Recently there was quite a bit of hubulub about Dropbox allowing everyone’s account to be accessed by anyone for 4 hours. This is bad, obviously. The guys over at Securosis got it right in their response. However, y’all should have known already to encrypt anything in the cloud if you were reading this here fine blog back in aught nine.

I clearly do not trust cloud, or really, any services online (I also take issue with “the cloud” being synonymous with “online”). The few online services I do use, I follow extremely good password practices. For example, my gmail password being over 20 characters of which I don’t know even know. Really, we should all be using two factor authentication to really lock things down.

I’m still quite concerned with a scenario where gmail is hacked site wide (not per use phished or even “whaled”). There’s nothing you can do in this scenario to protect yourself. How expensive in time, and potentially, literal money, is it worth to have a free service like gmail at the point it gets hacked? I’ve asked the same question myself and have even priced out other hosted, dedicated email services, free or no.

So, the point of this post is A) Nya nya, I told ya so and B) be safe!